My niece B turned 7 last month! I just can’t believe she is already 7. When it comes to me and my sisters, it only takes a small, little idea for us to go a little crazy. In this case, my sister saw a picture of a sugar cookie decorated like a lollipop. From then on, B was having a Lollipop Birthday Party! Since I happily take on any opportunity to be crafty, I offered my sister help, and we got brainstorming. The little details came out so cute!
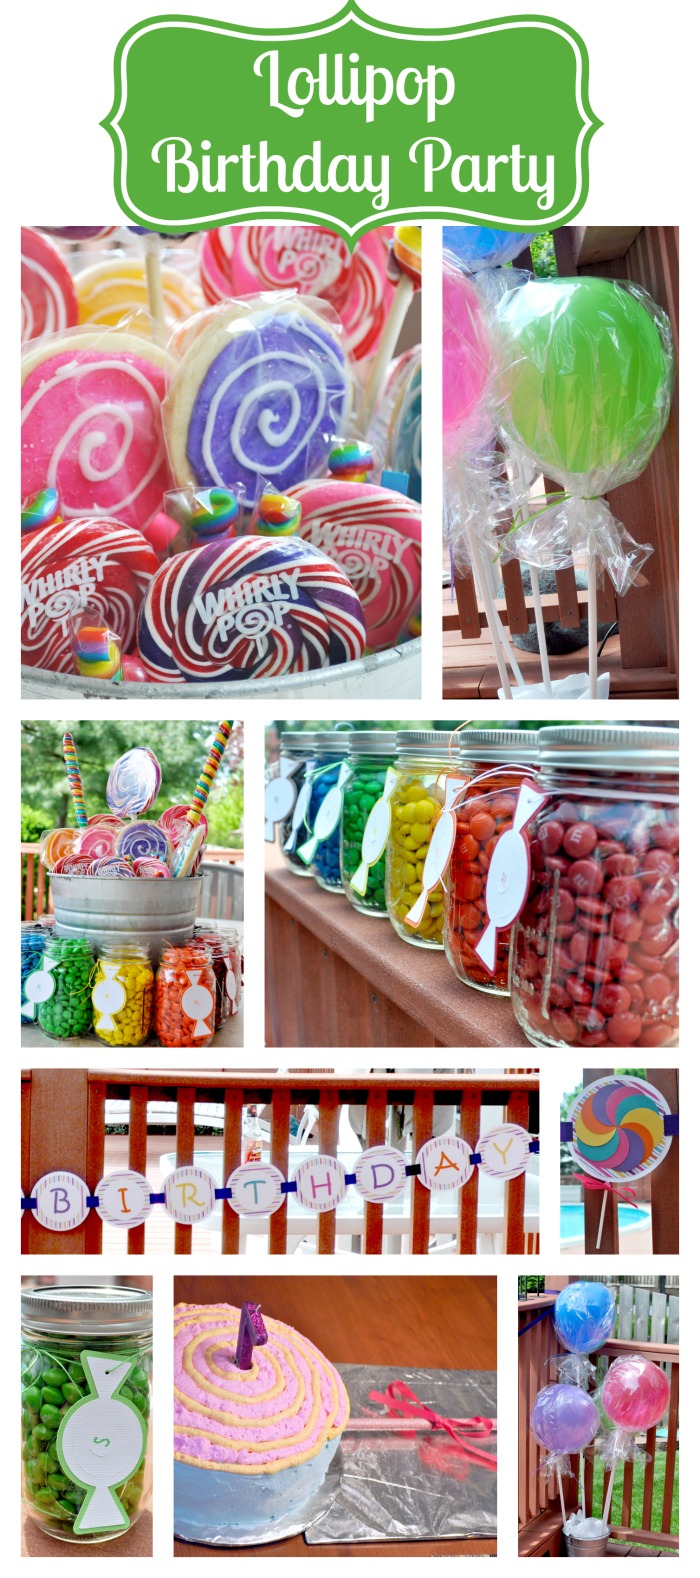
Now, let’s get to the details of this gal’s birthday party!
LOLLIPOP CENTERPIECE AND SUGAR COOKIES
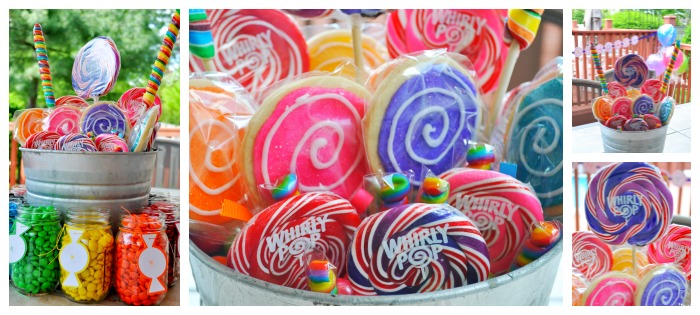
To start with, my sister created an awesome Lollipop Centerpiece! It was filled with large lollipops that she would let the kids at the party take home. The extra big one in the middle was for B of course!! She took a metal tin that she had at home and put a piece of styrofoam in the bottom for the sticks to go into. It is best to place the sticks once and don’t touch them again; otherwise, the holes will get to big and your lollipops will be lopsided.
She also made her own sugar cookie lollipops with little sticks in them to add to the centerpiece. If making the cookies and wanting to add them to your own display, it is important for them to be thick enough so that the sticks will support the cookie. Otherwise the cookie will just fall off. If you look closely at the picture in the middle above, the cookies are the row in the middle wrapped in cellophane.
LOLLIPOP BALLOONS
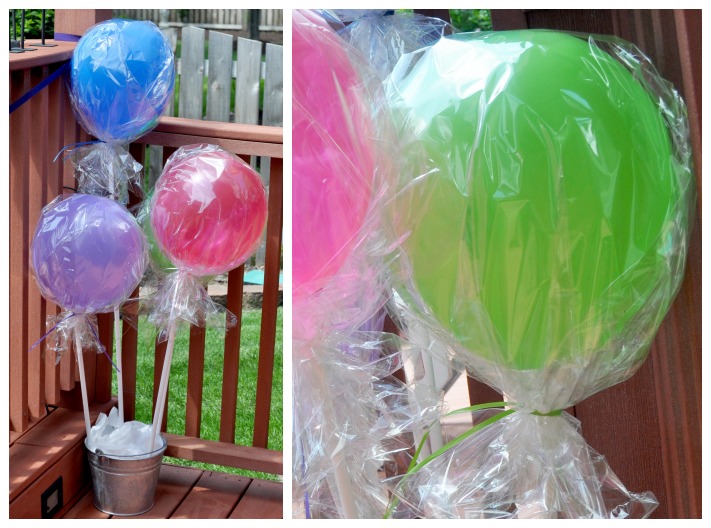
In order to have a larger piece for the decor, I made a Lollipop Balloon Centerpiece. I took helium filled balloons and placed them on top of white painted dowel sticks (1/2″ size). I took the balloon ribbon and wrapped it around the dowel a few times. This kept the balloon attached to the dowel securely enough to work with the cellophane. Wrapping them in the cellophane is a little bit of a pain because it slides all over the place. It will definitely go faster if you have a second set of hands. Keep in mind that you want a nice bunch at the bottom of the balloon like you would a rounded lollipop. To keep everything together, use string to tie the cellophane tightly around the dowel.
NOTE: I didn’t want to spend a ton of money on cellophane for the project, so I bought rolls at the Dollar Store. For 8 balloons, I used 4 rolls (cutting each in half).
For the display piece, I used the same principal as the the Lollipop Centerpiece – metal tin, styrofoam, and tissue paper to hide the styrofoam and make it look nicer. We used the other Lollipop Balloons as accents in other places, such as two framing her present pile.
CANDY JARS
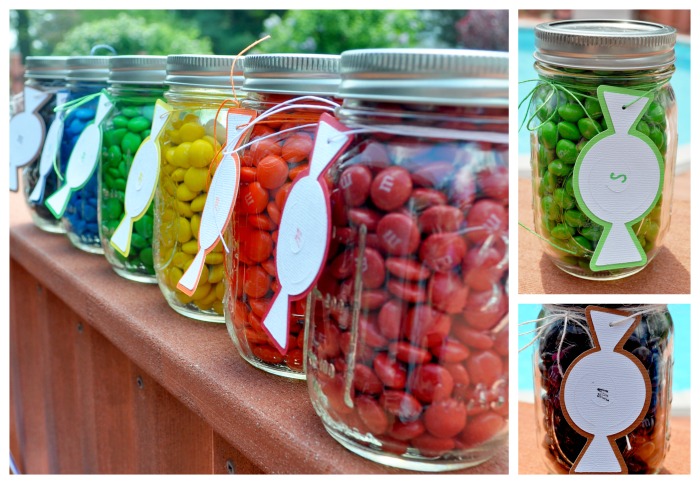
My sister liked the idea of separating the M&Ms and Skittles that we normally put out for parties into their own individual jars. My mother thought this was a little crazy, but it definitely offered a fun rainbow affect. Plus, lots of little jars tends to be cuter than just a mixed collection in a big bowl. The girls say down once night and got sorting. They, of course, also played the roll of quality controllers and ate plenty of candy as they sorted. My sister then pulled out her Cricut and made adorable little candy tags that identified the candies. Once we were all set up, we put these around the Lollipop Centerpiece so the kids could be in candy heaven.
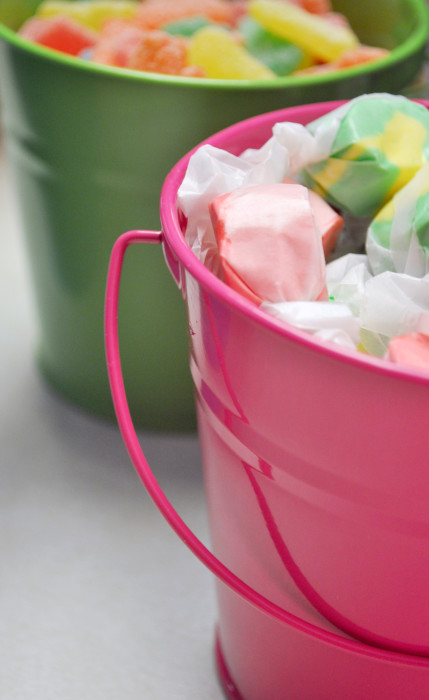
PLUS, if there wasn’t enough candy already, she used a couple of color buckets for some of B’s other favorite candies, like Sour Patch Kids and Taffy. Using the colorful buckets makes a huge difference than just a clear bowl or a whatever we have around bowl (which I am often guilty of).
LOLLIPOP BIRTHDAY SIGN
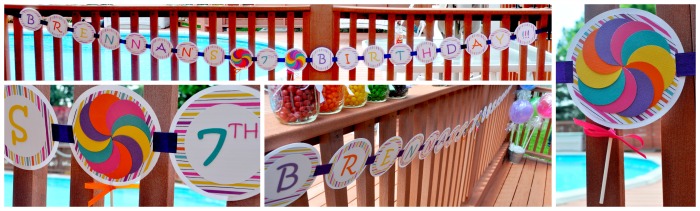
I figured every party needs a cute sign. I mean, right?! I sat down with my Silhouette and got to work.
- I decided what the sign was going to say so I knew how many pieces to cut out. Don’t forget to add spaces for in-between words.
- I knew I wanted each circle to be three layers: a thin layer of white, a thicker layer of patterned paper, and the smaller white circle in the middle for the letters. I used my Silhouette Studio and sized the 3 circles on the program. Then, I got cutting.
- I used a glue stick because it was readily available and glued all three layers to each other.
- I cut out the letters. I used a glue stick to attach these, too.
- I wanted a “lollipop” middle piece for between the words. I cut out 2 small circles from each color (per paper lollipop) and layered them into a circle. For this, I used adhesive squares because I could keep everything in place while securing them. Then, I taped a lollipop stick to back and glued the whole thing to the circle.
- I bought a 1 inch wide ribbon that would work as the string for the whole sign. Using a ruler and my exacto knife, I cut a line a little over 1″ on the left and right side of each circle. Then, I weaved the ribbon through. This takes patience. If you rush the process, you could end up ripping the paper.
NOTE: I also made a paper lollipop for her birthday card!
LOLLIPOP CAKE
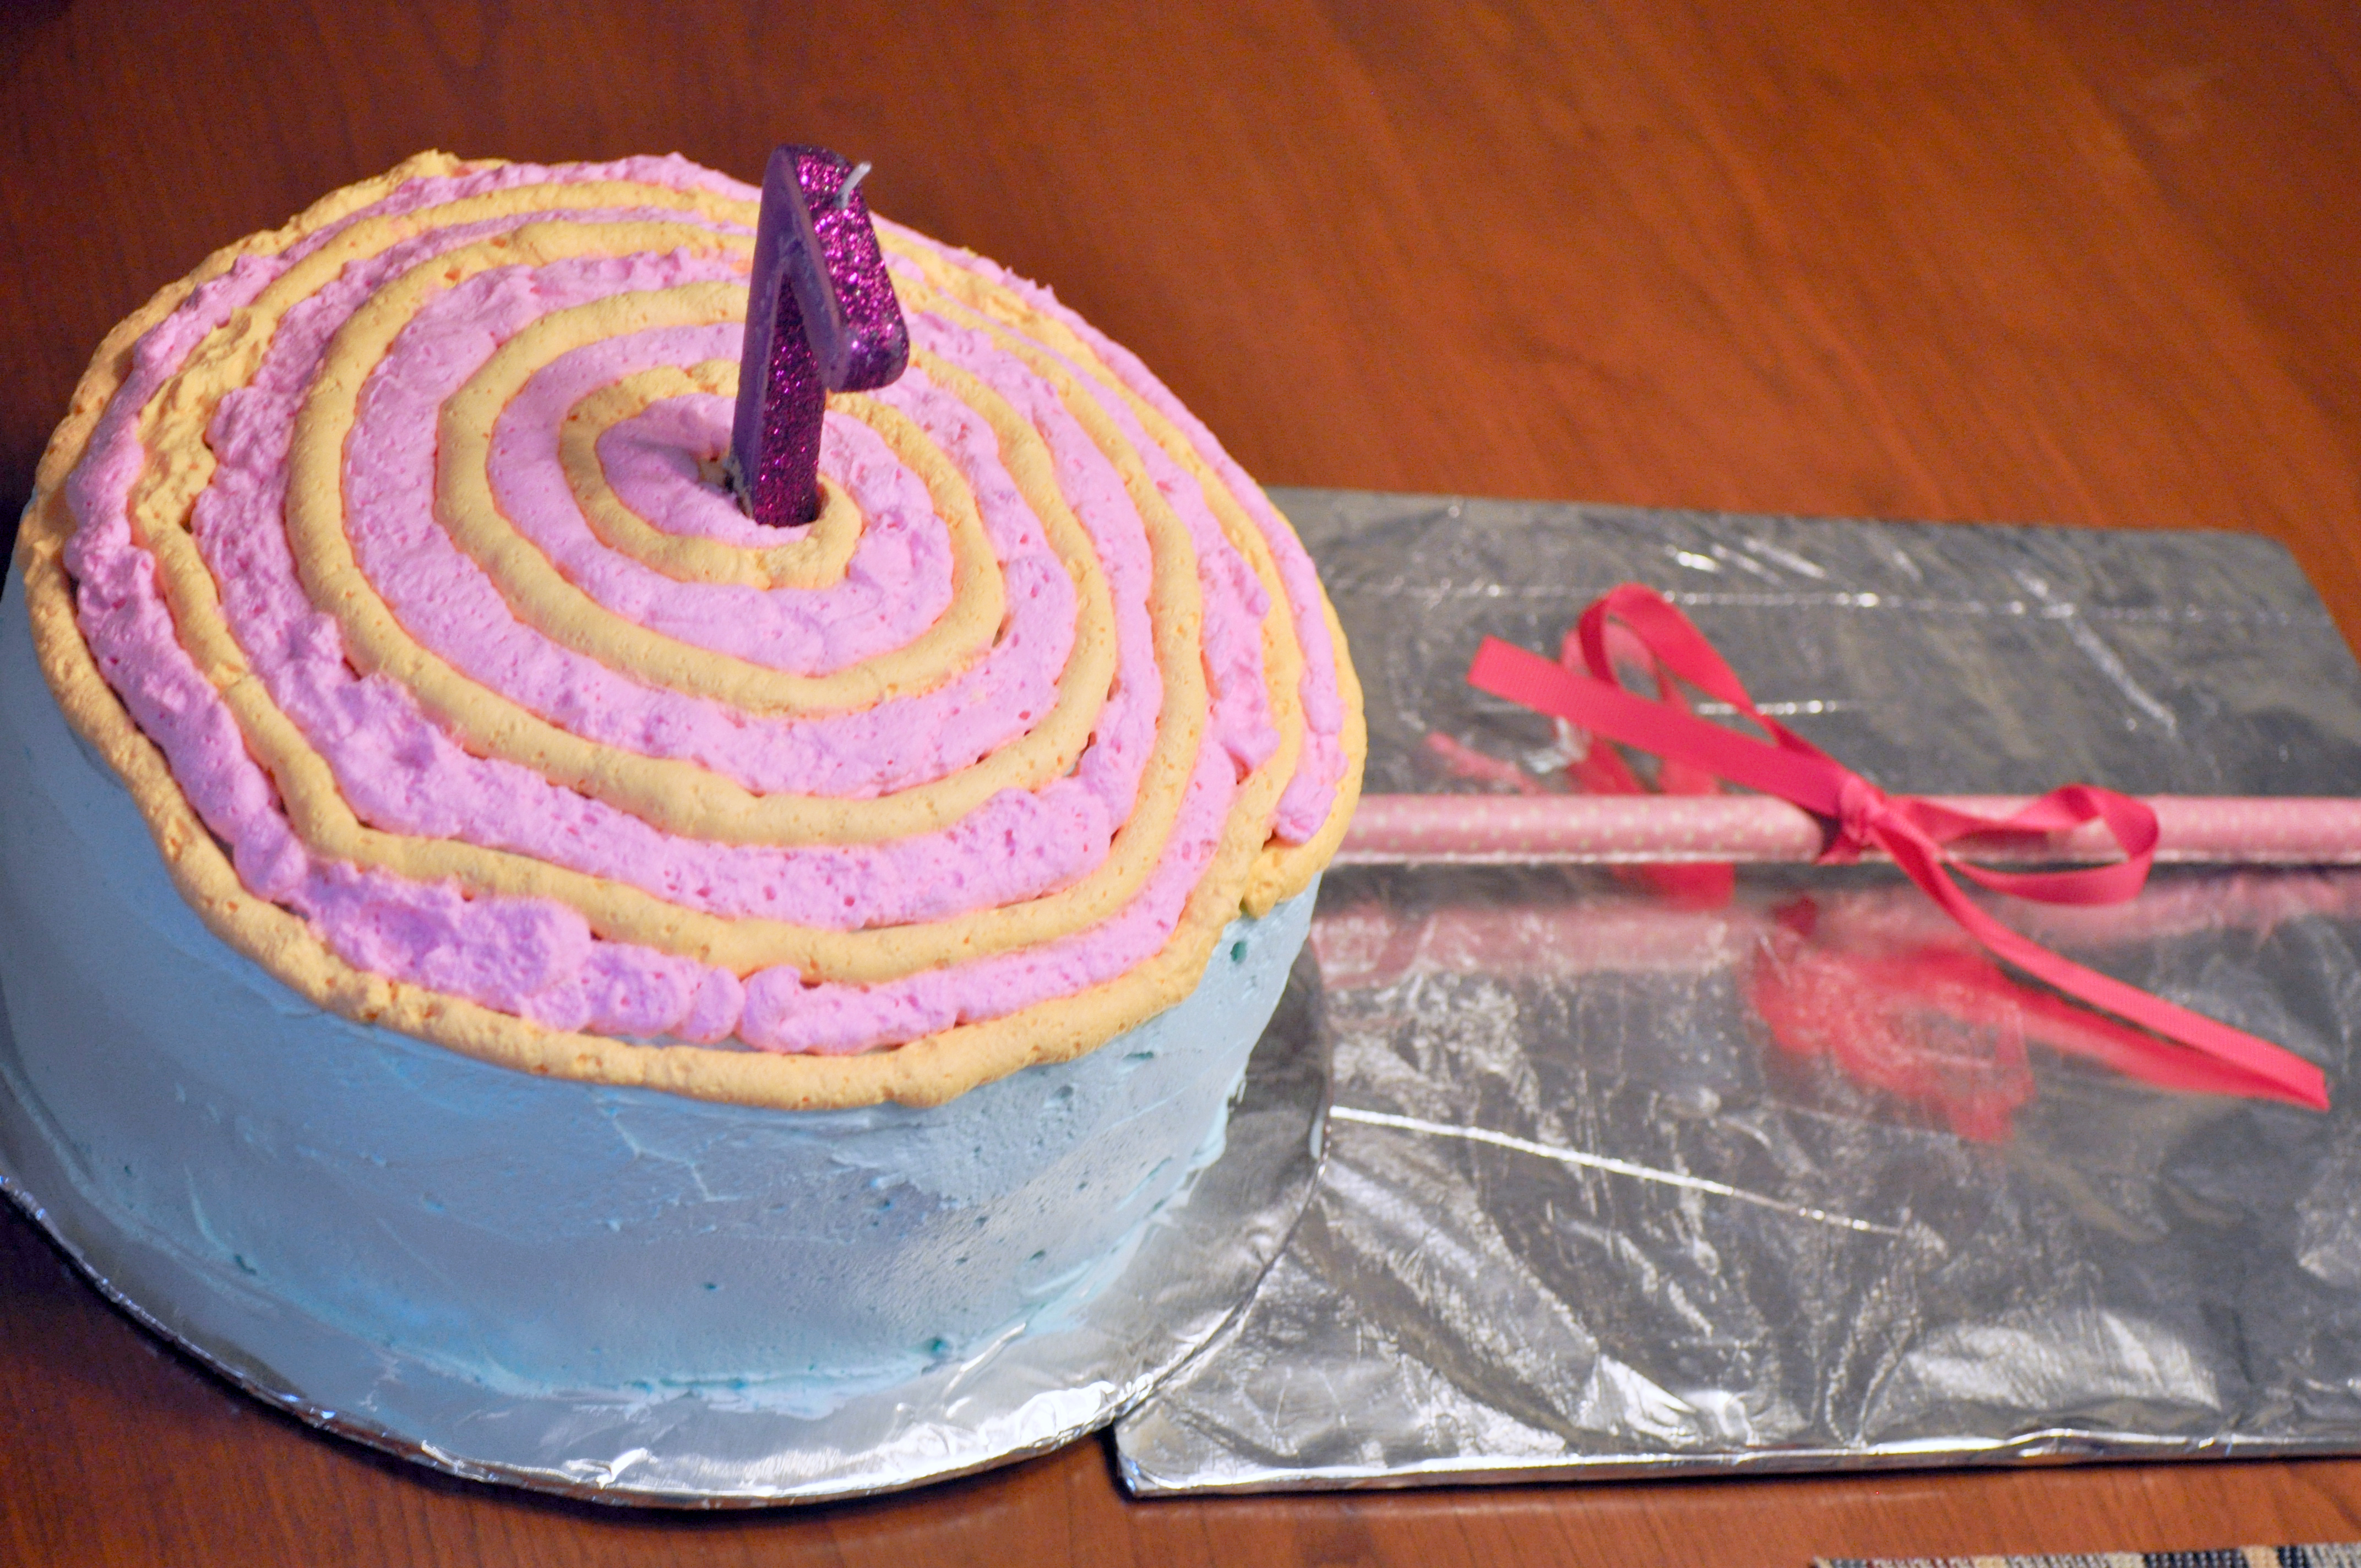
The cake had to be a chocolate cake with Cool Whip for icing. It is B’s absolute favorite. BONUS – it is also one of the only cakes that I will actually eat. My sister had the idea of mimicking the sugar cookie for the cake. She started with two round chocolate cakes and layered them with Cool Whip between. Then, a layer of blue Cool Whip was added to the outside. Then, the orange Cool Whip was piped on in a swirl, followed by the pink Cool Whip. We used a dowel for the stick and wrapped it in pink Washi tape to make it prettier. It was very colorful, just like B requested!
The party was a great success!! We didn’t get to go swimming because it was a little chilly that day, but she still had a blast and got a whole bunch of clothes and American Girl Doll items. So to top off this post, here is the birthday girl!

What’s your favorite element of the party?
Aunt Bee says
This was SUCH a cute idea for a party! Everything looked adorable! Y’all are so crafty!
Sandra - The Foodie Affair says
What a fun party theme! Isn’t the Dollar Store great for parties? Those lollypop balloons are so creative. You’re niece is a cutie!
Vohn's Vittles says
What a fab party! You’re niece is a very lucky girl. The kids must have adored all your work. Brilliant!