Important Note: I am not an authority on MailChimp and am very new myself to the program. If I can clarify or add any additional tips, please let me know. {There is a referral link within the post. With a paid account, we will both be awarded MonkeyRewards.}
One of my blog goals for the year was to start a newsletter! If anything else, I figured this would make it easier for my mother to stay up to date with the blog. I spent a lot of time reading through other blogs, articles and the help section of MailChimp to get it started, so I wanted to save you all some time and explain the process. Therefore, I will be giving you at least 2 posts on STARTING A MAILCHIMP BLOG NEWSLETTER: setting up your options/groups and (2) creating your campaigns. It does take a little time, but it is a fairly simple process once it is all laid out in front of you.
For my newsletter, I created 3 email campaigns: daily, weekly, and monthly. My subscribers MUST choose one of these three options when they sign up. Forewarning, to get these set up, you need to have an email added to each of the three options, so I recommend having access to as many email accounts as email campaigns that you are creating. You don’t be able to add one email to multiple campaigns.
Let’s get started, shall we?!
STEP 1: Set up your MailChimp Account
First think you need to do, create a MailChimp account. This is a free service until you reach 2,000 subscribers. Once you created your account, make sure you are logged in.
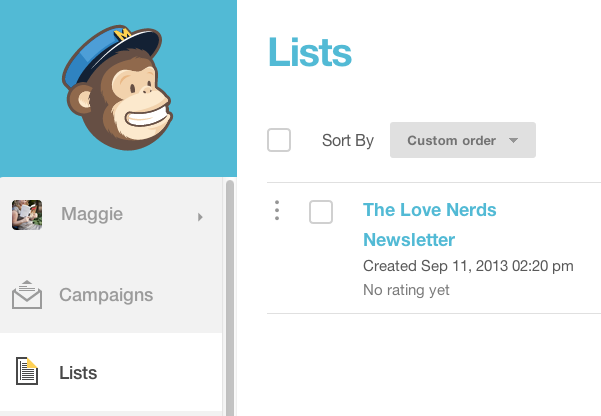
You might notice from this picture that I tried to start this back in September. I got so frustrated that I stopped and didn’t come back until March. How’s that for perseverance? I’m really hoping this blog post will prevent all of you from that fate.
STEP 2: Create List
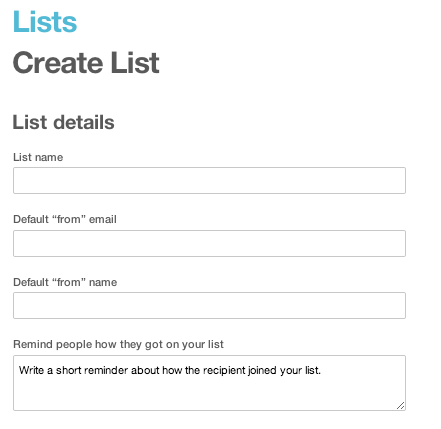
Under Lists, select “Create List”. As you can see, mine is named The Love Nerds Newsletter. The form will give you tips on what to fill out and you will set some of your personal preferences, such as how often you are updated my email on subscribers.
STEP 3: Sign Up Form
Once you have created this list, you will want to click on it to get to the screen below. Then, head to SIGNUP FORMS.
You will see three different signup form options: General, Embedded, or Form Integrations. I have not looked to closely at the last, though I know it involves possible integration on platforms like Twitter. Embedded forms will provide you with an html to include which is helpful for sharing on a blog post, allowing readers to sign up right there. I prefer the General form though which will provide a link to the signup form, especially because I don’t want a large signup form on the blog with lots of options.
Step 4: Create General Sign Up Form
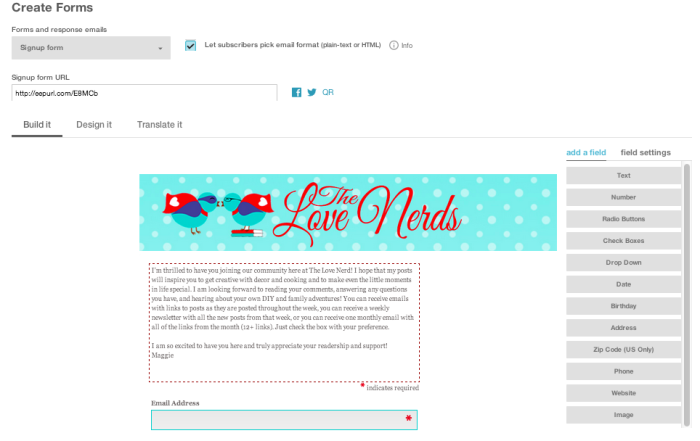
When you click on General Form, you will see something similar to this:
You have a BUILD IT section, which is where you will spend most of you time. You can upload a header, write your introductory commentary, and select the desired information for your form.
The DESIGN IT section will give you choices for font or background color and font choices. The small little details to polish up your brand.
STEP 5: Set Update Options
Choosing the type of subscription options for your newsletter. On the right hand side of the BUILD IT section, you will see a tab called Radio Buttons. Click that, and you will get this form to fill out on the right hand side of your screen.
Below you will be able to see how the answers above directly show on the form. The FIELD LABEL is the heading. I used a question because I wanted to make it clear that this was something they needed to respond to – “How would you like your updates?”
I highly recommend making this section required so they must choose their own setting. Later, this will make sure everyone is assigned to the right email mailing.
You will also need to check “visible”.
Lastly, you will need to add the options you have decided to provide. In my case, this is daily, weekly, or monthly. Try to be very clear in your language so they understand what they are choosing. You can see my descriptors below.
Then, click SAVE!
There are lots of options that you can add to your form. I like to keep mine simple because I think people give up on long forms easily. Or is that just me? I also don’t think people like over sharing information. Therefore, I have asked for a first name, because it allows me to personalize the newsletters later, but I do NOT ask for last names. I don’t see why I need that information, so I don’t ask. It is totally up to you thought what information you want. Again, I am not an authority and could kick myself later for this decision.
If you would like to see what my form looks like all done and polished, you can head here: https://eepurl.com/E8MCb.
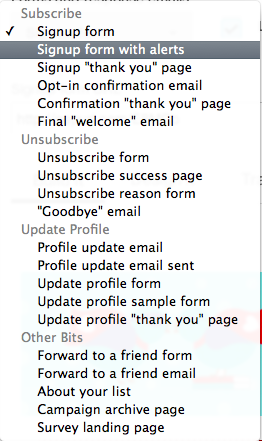
BEFORE LEAVING SIGN UP FORMS: This main sign up form is the most important to have completed before moving forward. However, I do want to draw your attention to the other lists of forms you can modify. All of these forms can be modified in language and look. While I haven’t changed all of them, I have updated some of the language to be more authentic to my writing style. Making it more personal can’t hurt! I don’t encourage you to go overboard though; most people don’t spend a lot of time reading a confirmation email, for example.
Step 6: Create Segments to Match Update Options
Now it is time to create your segments, which are the groups that you subscribers will be enrolled into based on their choice of how they want to receive their updates. Since I am offering a daily, weekly, and monthly option, I will need a daily, weekly, and monthly segment. Hope that makes sense!
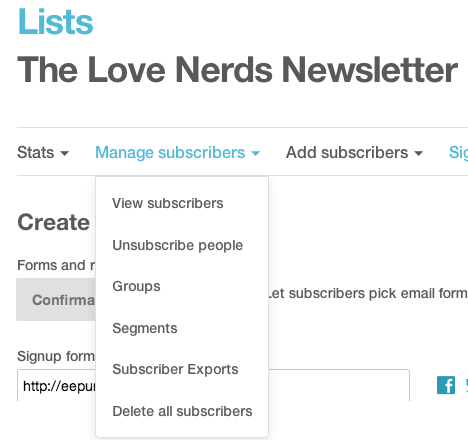
To get to SEGMENTS, click MANAGE SUBSCRIBERS in the top menu bar and then SEGMENTS.
You will then want to CREATE A NEW SEGMENT.
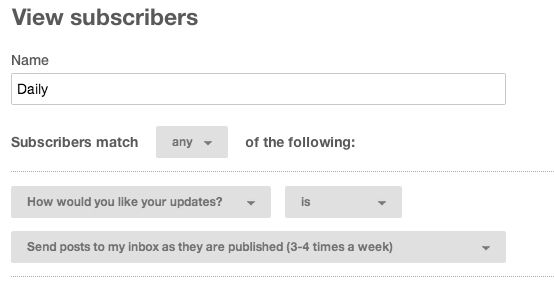
You are going to create as many segments as email update options you have provided. In my case, I needed to create 3 segments (daily, weekly, and monthly). I have shown you the example for DAILY below so you can see what it will look like.
NAME: You are the only one that will see this, so name it something easy that you will remember. I named this one DAILY.
SECOND DROP DOWN BOX: For a new segment, this should say “DATE ADDED”. Click on it and go to the bottom of the drop down menu where it should say MERGE FIELDS. Choose the one you added on the SIGNUP FORM.
FOURTH DROP DOWN BOX: After updating the first, the last drop down menu should change to only list the three choices you provided on the SIGNUP FORM. Choose the one that matches your name for the segment, then click PREVIEW SEGMENT.
IMPORTANT NOTE: When you are making a new segment, make sure to check the option for AUTO UPDATES. This will save you a ton of time in the future because it will automatically sort your subscribers onto the appropriate email list. You won’t have to do anything!
I hope you enjoy MailChimp because you are now ready to set up your email newsletters/campaigns. The next post in the series discuss how to set up your email campaigns.
Do you have a blog newsletter? How many newsletters do you follow?



Taralyn says
Pinned this right away! A newsletter is on my to-do list. I’ve signed up with mailchimp, but haven’t gotten started.
Lois Alter Mark says
I love Mail Chimp and think your tutorial is a perfect introduction!
Krista says
I love mailchimp! Great email service
Beeb Ashcroft says
Great and thorough tutorial – thanks for taking the time to create this!
Shauna says
I have been thinking about changing my newsletter lately… this sounds like a great option. Thanks so much
Mama to 5 BLessings says
I have been wanting to do this myself but the negative is that they have a small maximum number.
Annie {Stowed Stuff} says
Oh my gosh, thank you! I so needed this. I’m pinning it so I remember to come back and go through all the details!
Amy Desrosiers says
I love that you gave us a step by step tutorial for changing to Mail Chimp. I use Feed Burner, but am looking for other options for my readers.
Amy Desrosiers says
I love that you gave us a step by step tutorial for changing to Mail Chimp. I use Feed Burner, but am looking for other options.
brett says
i have been looking for a new newsletter service too. this is REALLY helpful for us tech-clueless ladies. (me)
Robin {Mom Foodie} says
I started one, then never really followed through… I need to get on that.
Dee says
Great tutorial! That really helps a lot!
Wendy says
I’ve been thinking about doing a newsletter- thanks for an easy to follow tutorial!
Pam says
Great walkthrough! I love that you covered everything so thoroughly.
Debbie Denny says
I have heard about them and thought it might be a good idea to start one.
Sandra says
I love this post girl, so informative!!! Thank you!
Elizabeth Towns says
I have been considering a newsletter as well. I do read a few of the newsletters I am subscribed to from some blogs – they are arranged very well and give me great information about whats going on on those blogs and with those bloggers. This is great information, thanks!
Helene Cohen Bludman says
Great resource! I love using Mail Chimp because once you get the hang of it, it’s very user-friendly.
Jennifer Brazil says
Thanks for this tutorial! Having a mailing list is so important!
Robin (Masshole Mommy) says
I am bookmarking this because I have been giving serious thought to starting up a newsletter!
Teresa @ Crafty Wife says
This is great! I’ve been wanting to do a newsletter myself but it all seemed so overwhelming. Thank you for taking the time to write it all down in an easy to understand format. 🙂